Creating Portals
Portals are secure spaces where you share files and collaborate with clients. Each portal can have its own guests, files, tasks, and workflow state.
Creating a New Portal
From the Main Dashboard
- Navigate to the Portals page (your main dashboard)
- Click the New Portal button in the top-right
- Enter a name for the portal (e.g., client name or project)
- Click Create
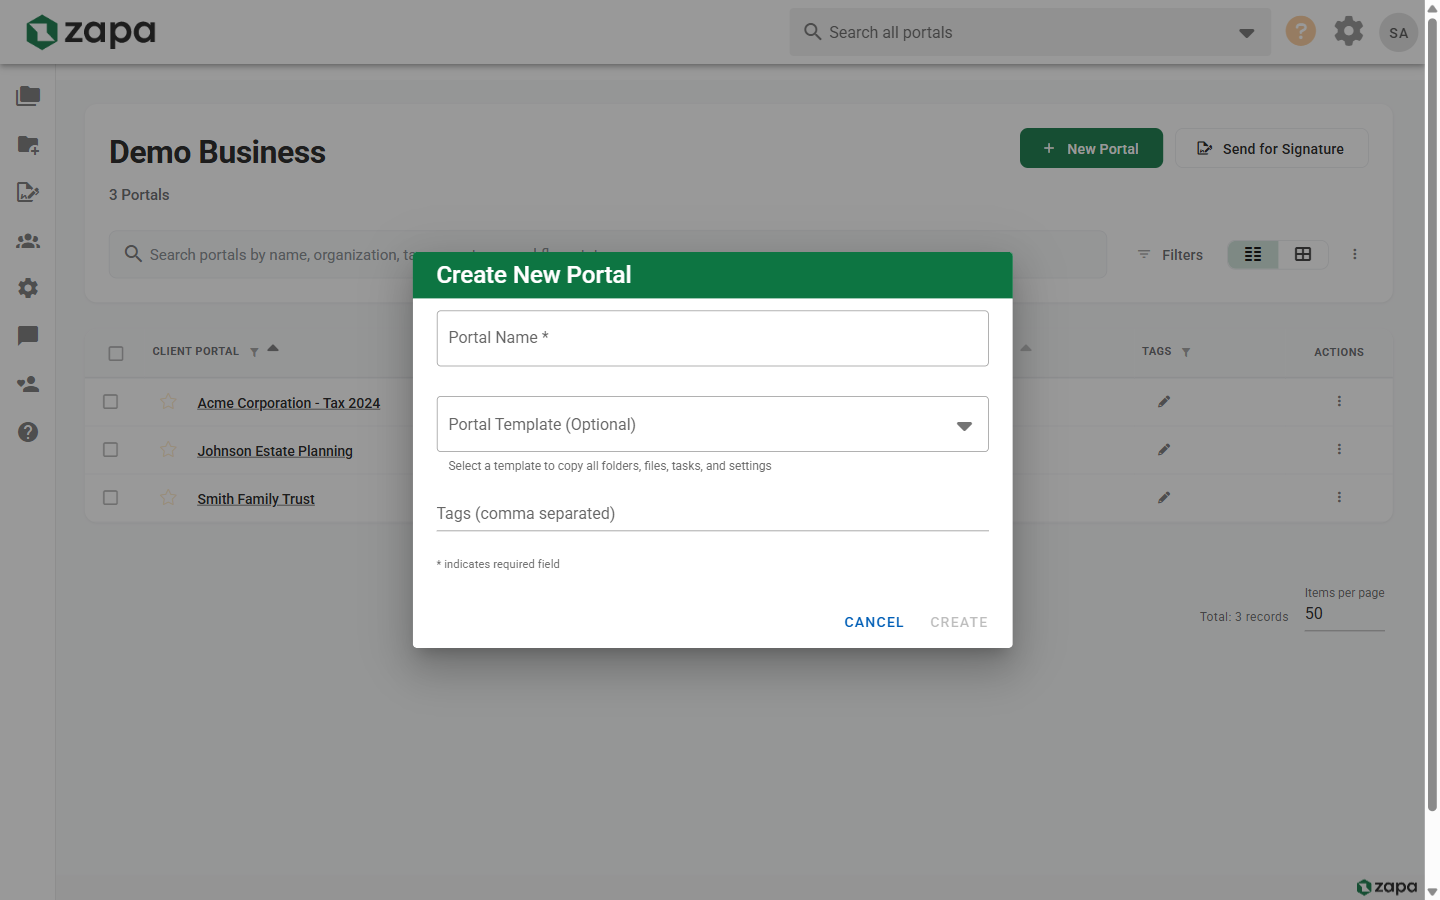
Your new portal is created and ready for files and guests.
From a Template
Portal templates are available on Large Firm and Enterprise plans.
If your organization has portal templates configured:
- Click New Portal
- Select a template from the dropdown
- The portal will be created with:
- Pre-configured folder structure
- Default settings from the template
- Enter a portal name
- Click Create
For more on templates, see Portal Templates.
Portal Settings
After creating a portal, you can configure its settings:
Portal Name
Click the portal name at the top to edit it. Names can include:
- Client names
- Project identifiers
- Case numbers
- Any descriptive text
Tags
Tags help organize and filter portals:
- Open the portal
- Click the tags icon or Add Tag
- Enter tag names (e.g., "Active", "Tax 2024", "Priority")
- Press Enter to add each tag
Use tags to:
- Filter portals on the main dashboard
- Group related portals
- Track project status
Workflow States
Assign workflow states to track portal progress:
- Open the portal settings
- Select a workflow state from the dropdown
- States appear in the portal list with visual indicators
Default workflow states:
- New - Just created
- In Progress - Active work
- Review - Awaiting client review
- Complete - Work finished
- Archived - No longer active
Custom workflow states are available on Large Firm and Enterprise plans. See Workflow States.
Privacy Settings
Private portals are available on Large Firm and Enterprise plans.
Control who can see the portal:
- Standard - Visible to all organization members
- Private - Only visible to assigned team members and guests
Portal Limits
Your subscription tier determines portal limits:
| Tier | Active Portals |
|---|---|
| Professional | 1,000 |
| Large Firm | 10,000 |
| Enterprise | Unlimited |
When approaching your limit, you'll see a warning on the dashboard.
Archiving Portals
Archive portals to remove them from your active list without deleting:
- Open the portal
- Click the menu icon (three dots)
- Select Archive Portal
Archived portals:
- Don't count against limits (on some plans)
- Can be restored at any time
- Are hidden from default views
- Retain all files and history
Viewing Archived Portals
- On the main dashboard, click Filters
- Enable Show Archived
- Archived portals appear with an archive icon
Restoring Archived Portals
- Open the archived portal
- Click Restore or the menu and select Restore Portal
Deleting Portals
Deleting a portal permanently removes it and all its contents. This action cannot be undone.
To delete a portal:
- Open the portal
- Click the menu icon (three dots)
- Select Delete Portal
- Confirm the deletion
Searching and Filtering
The main dashboard offers powerful search and filtering:
Search
Type in the search bar to find portals by:
- Portal name
- Guest names
- Tags
- Workflow state
Filters
Click Filters to filter by:
- Portal name - Partial match
- Tags - One or more tags
- Workflow state - Current state
- Archive status - Show/hide archived
- Favorites - Show only favorites
Favorites
Star portals to mark them as favorites:
- Hover over a portal card
- Click the star icon
- Use the Favorites filter to show only starred portals
Portal Views
Switch between different views on the dashboard:
- Card View - Visual cards with portal info
- List View - Compact list for many portals
- By Guest - Portals grouped by guest user
Related Topics
- Managing Files - Upload and organize files
- Inviting Guests - Add clients to portals
- Portal Templates - Create reusable portal structures
- Workflow States - Configure custom workflows