Preferences
The Preferences tab in Settings controls portal behavior, terms and conditions, and workflow state configuration.
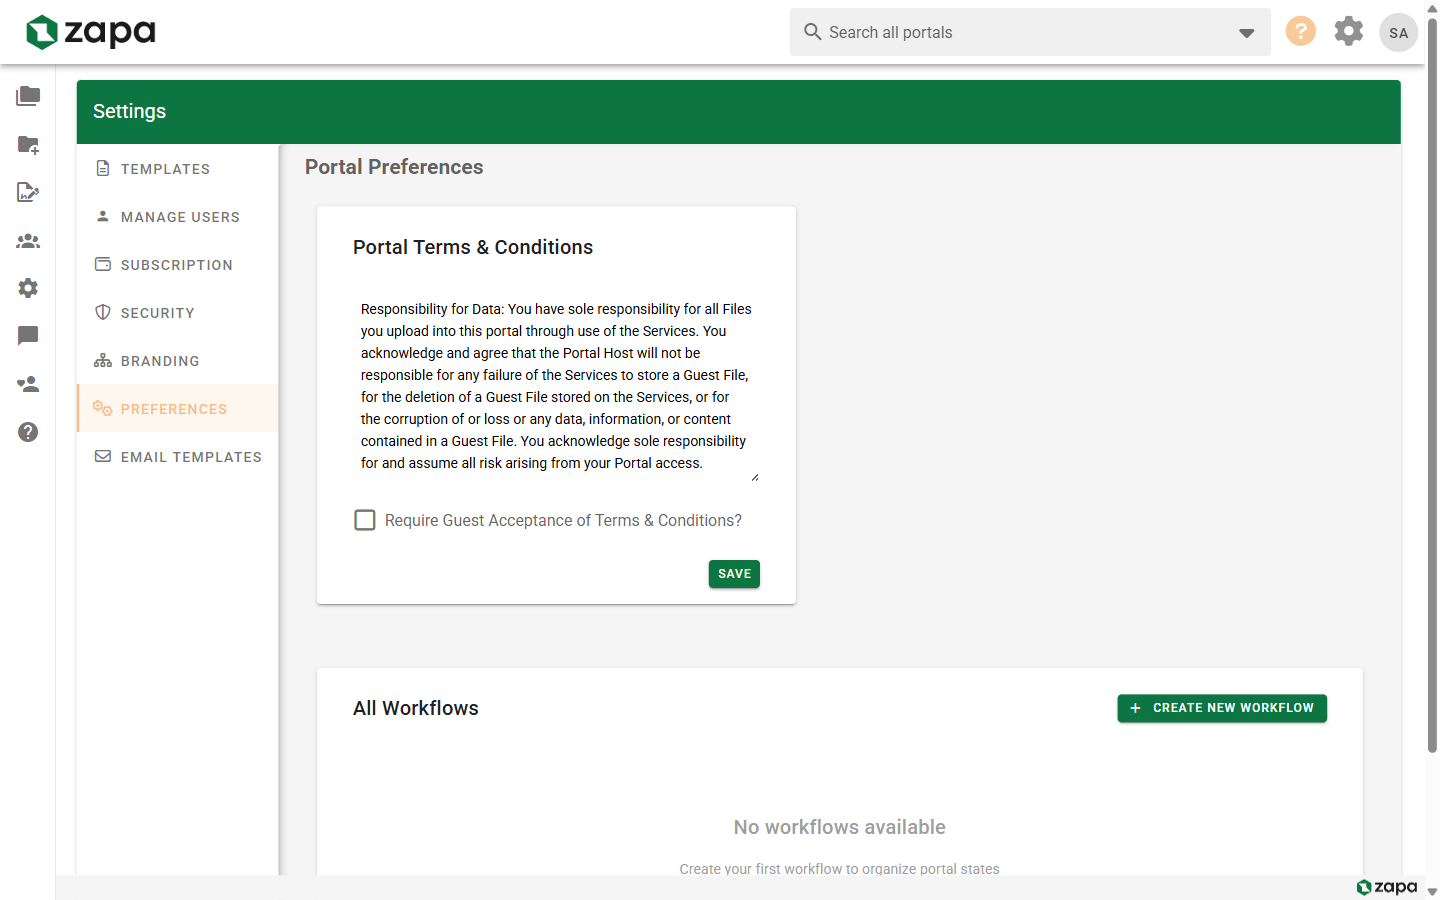
Accessing Preferences
- Go to Settings
- Click the Preferences tab
Terms & Conditions
Require guests to accept terms before accessing portals.
Setting Up Terms
- Enter your terms text in the text area
- Toggle Require Guest Acceptance of Terms & Conditions
- Click Save
What Guests Experience
When terms are enforced:
- Guest opens a portal
- Terms modal appears
- Guest must click "Accept" to continue
- Acceptance is logged with timestamp
Best Practices
- Keep terms clear and readable
- Include relevant legal provisions
- Update when policies change
- Test the guest experience
Acceptance Tracking
Guest acceptance is recorded:
- Per portal
- With timestamp
- Visible in audit logs
External Systems
Define the other systems your firm uses (for example QuickBooks, Clio, Dropbox, or your tax software) so each portal can store the client's ID in that system.
Defining Systems
- In the External Systems card, type a system name and click add
- Repeat for each system; existing systems appear as chips
- Remove a system by clicking the chip's close icon
Setting a Portal's IDs
- Open a portal and expand its settings panel
- Under External System IDs, enter the client's ID for each system
- Values save when you leave the field or press Enter
Use each ID for one portal only — integrations look portals up by these values, and the API rejects an ID that is already assigned to another portal.
Why It Matters
External system IDs let integrations match a portal to your own records without a lookup table:
- API clients can find a portal by system and ID, and set IDs when creating or updating portals
- Every webhook payload includes the portal's IDs as
external_system_ids - The Zapier Find Portal by External ID search uses them directly
See the Developer Quickstart for API usage.
Workflow States
Custom workflows are available on Large Firm and Enterprise plans.
Workflow states help track portal progress through your business process.
Default vs Custom Workflows
Professional tier:
- Standard states only (New, In Progress, Review, Complete, Archived)
- Cannot customize
Large Firm & Enterprise:
- Create custom workflows
- Define custom states
- Assign colors
- Multiple workflows for different work types
Legacy Workflow Mode
The legacy workflow is your organization's default:
- Find Legacy Workflow Mode
- Toggle Enabled on or off
- States appear in the table below when enabled
When enabled:
- Default workflow available on all portals
- States defined at organization level
- Portals can be assigned to any state
Managing Workflows
Viewing All Workflows
The All Workflows section shows:
| Column | Description |
|---|---|
| Workflow Name | Name with "Legacy" badge if applicable |
| Description | Optional description |
| States | Count of states in workflow |
| Status | Enabled/Disabled or Active |
| Actions | Edit and Delete buttons |
Creating a New Workflow
- Click Create New Workflow
- Enter workflow details:
- Name - Descriptive name (e.g., "Tax Return Process")
- Description - Optional explanation
- Add states to the workflow
- Click Save
Maximum of 10 workflows per organization.
Editing a Workflow
- Click the workflow row or edit button
- Modify workflow properties:
- Name and description
- Add, edit, or remove states
- Reorder states
- Change state colors
- Click Save
Deleting a Workflow
- Click the delete button on a workflow
- Confirm deletion
- Choose what to do with portals using this workflow
The legacy workflow cannot be deleted, only disabled.
Workflow States Configuration
Each workflow contains states:
Adding States
- Open the workflow editor
- Click Add State
- Enter state details:
- Name - State display name
- Color - Visual indicator color
- Description - Optional explanation
- Save the workflow
Editing States
- Click on a state in the list
- Modify name, color, or description
- Save changes
Reordering States
- Drag states using the handle
- Order affects dropdown display
- Place states in logical flow order
Deleting States
- Click delete on a state
- If portals use this state:
- Choose replacement state
- Or leave unassigned
- Confirm deletion
State Colors
Choose colors for visual identification:
| Color Use | Suggestion |
|---|---|
| Starting states | Blue, neutral |
| In-progress states | Yellow, orange |
| Waiting states | Purple, gray |
| Complete states | Green |
| Problem states | Red |
Workflow Limits
- Maximum 10 workflows per organization
- No limit on states per workflow (reasonable limit recommended)
- Deleted workflows cannot be recovered
Using Workflows in Portals
Assigning Workflow State
- Open a portal
- Find the workflow state selector
- Choose the workflow (if multiple)
- Select the state
- State updates immediately
Filtering by State
On the All Portals dashboard:
- Click Filters
- Select workflow states
- View matching portals
Workflow in Views
Workflow state appears:
- On portal cards
- In portal list view
- In portal header
- In search results
Workflow History
State changes are tracked:
- Who changed the state
- When it changed
- Previous and new state
- Visible in portal activity
Preferences Best Practices
Terms & Conditions
- Review and update annually
- Keep language simple
- Include key provisions only
- Test guest experience
Workflows
- Design workflows before creating
- Limit states to essential stages
- Use consistent naming
- Train team on state meanings
- Document transition rules
Organization
- Review preferences quarterly
- Gather team feedback
- Adjust based on usage patterns
Related Topics
- Workflow States - Detailed workflow guide
- Creating Portals - Using states on portals
- Settings Overview - All settings tabs